Showing Hint under the Title to View a Page With Comments
Dear Friend,
My friend Carlos asks me how to let readers to see posts with comments. I think this is not possible while a viewer is seeing a label or archived query, or if he or she is looking at the home page. I guess the technical reason why Blogger in Beta didn't implement that, is just simply try to avoid a potentially large stream of data to arrive to the viewer's PC. Imagine a situation where you query a category that has 20 posts in each, each post with 20-30 comments. It'll take quite a while to display that page to your screen.
My work-around to this would be to give a hint to the reader to click on the title of the post in order for him or her to read both the full post and the comments.
If you like this solution, then follow these simple steps:
1. Locate the Blog1 widget
<b:widget id='Blog1' locked='false' title='Blog Posts' type='Blog'>
then the includable named "post"
<b:includable id='post' var='post'>
2. Insert the seven lines in bold to the code. What this does is to check if you're allowing comment for a post, your post has at least one comment ( !=0 ), and you are not on the full post (item) page, then insert the hint. Feel free to use your HTML expertise to alter the simple tags I have, or change the text to become clearer.
<b:includable id='post' var='post'>
<div class='post uncustomized-post-template'>
<a expr:name='data:post.id'/>
<b:if cond='data:post.title'>
<h3 class='post-title'>
<b:if cond='data:post.url'>
<a expr:href='data:post.url'><data:post.title/></a>
<b:else/>
<data:post.title/>
</b:if>
</h3>
<b:if cond='data:post.allowComments'>
<b:if cond='data:post.numComments != 0'>
<b:if cond='data:blog.pageType != "item"'>
<div><i>(For full text with comments please click on the title)</i></div>
</b:if>
</b:if>
</b:if>
</b:if>
I apply this fix to my webpage, so you can see how this works.
Have a wonderful day,
Hoctro
Blogger Hack: Adding Introductions
Dear Friend,
Sometimes a little introductory paragraph or two helps "break the ice" between you and your readers, so they know what they are about to read, rather than just guessing based on one or two "label" words. You can see the new hack in effect on my site. Select on "Blogger Beta"->"My Hacks", for example, will display a little introduction first, then all the hack articles.
Below are the steps on how to implement this hack. As usual, make a template backup copy, then try it on your test blog first. Also, remember to check on "Expand Widget Templates."
Step 1: Add "introduction" function to Blog1 widget
First, locate the widget by looking for this line:
<b:widget id='Blog1' locked='false' title='Blog Posts' type='Blog'>
Once you see it, look for this line:
<b:includable id='main' var='top'>
Then paste this code right in front of it:
<b:includable id='sub-introduction' var='data:posts'>
<!-- **Introduction Hack - by Hoctro 10/2006 hoctro.blogspot.com ** Step 1 **
**** -->
<b:if cond='data:blog.pageType != "item"'>
<b:loop values='data:posts' var='post'>
<!-- Check for Homepage case -->
<b:if cond='data:blog.url == data:blog.homepageUrl'>
<b:if cond='data:post.title == "Introduction"'>
<div class='post'>
<div class='post-body'>
<p><data:post.body/></p>
</div>
</div>
</b:if>
</b:if>
<!-- Check for matched labels -->
<b:loop values='data:post.labels' var='label'>
<b:if cond='data:post.title == data:label.name'>
<div class='post'>
<div class='post-body'>
<p><data:post.body/></p>
</div>
</div>
</b:if>
</b:loop>
</b:loop>
</b:if>
</b:includable>
Step 2: Modify the main includable of Blog1 widget
Scroll down to this line again,
<b:includable id='main' var='top'>
then look for the portion of code that starts and ends with these lines,
<div id='blog-posts'>
...
<!-- navigation -->
<b:include name='nextprev'/>
You are going to replace everything in between with these lines,
<!-- **Introduction Hack - by Hoctro 10/2006 hoctro.blogspot.com ** Step 2 **
**** -->
<b:include name='sub-introduction' values='data:posts'/>
<b:loop values='data:posts' var='post'>
<b:if cond='data:post.title == "Introduction"'>
<b:if cond='data:blog.pageType == "item"'>
<b:include data='post' name='postQuickEdit'/>
<b:include data='post' name='post'/>
</b:if>
<b:else/>
<b:if cond='data:post.dateHeader'>
<h2 class='date-header'><data:post.dateHeader/></h2>
</b:if>
<b:include data='post' name='postQuickEdit'/>
<b:include data='post' name='post'/>
<b:if cond='data:blog.pageType == "item"'>
<b:if cond='data:post.allowComments'>
<b:include data='post' name='comments'/>
</b:if>
</b:if>
</b:if>
</b:loop>
</div>
Step 3: Name your new introductory posts with "special" titles
Name your "special" new introductory posts' titles with exactly the same label names. for example, for the introductory post of "My Hack" to show correctly on my homepage, I had to name the title as "Blogger_Beta*My_Hacks" (I use my own's two level tab hack, hence the star (*) symbol in the middle) Also, after composing this special post, you need to change the date to some time in the past, so it will not show up as the latest. Also, if your introductory post has more than one label (which you shouldn't do,) make sure the last label is the same as the post's title.
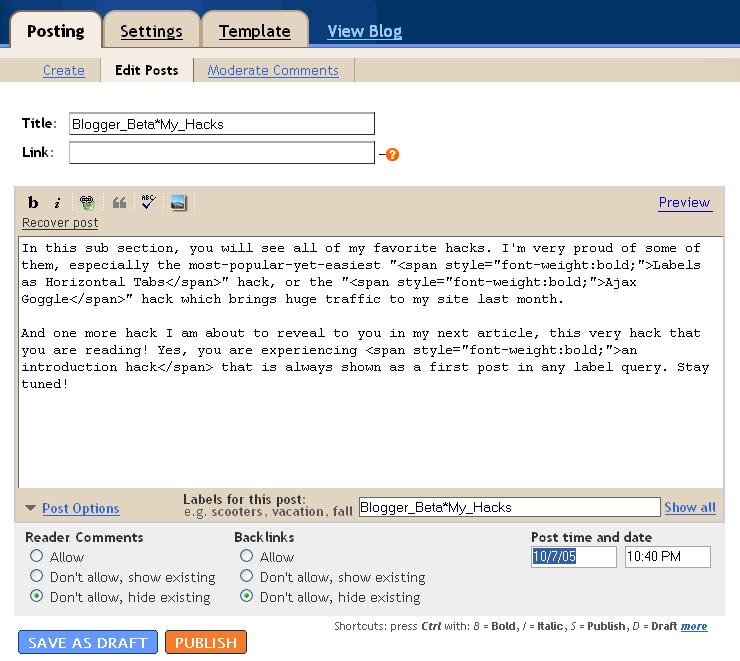
here is the result,

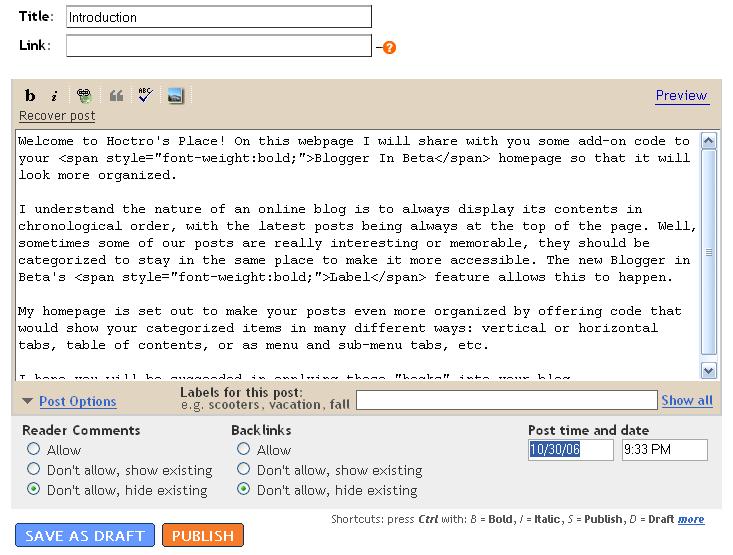
For an introduction in your homepage, you will need something different. You need to create a post with the title "Introduction", do not assign a label (leave it blank), and set the date to a distant future! (I owe Hans from "Beautiful Beta" for this "set-in-a-future-date", by the way. Thanks! Hans.) This will make sure the post always includes in the homepage's post collection, thus it will show up. When displayed, this post will not show a title nor allow any comment from the readers.
Here is the result,
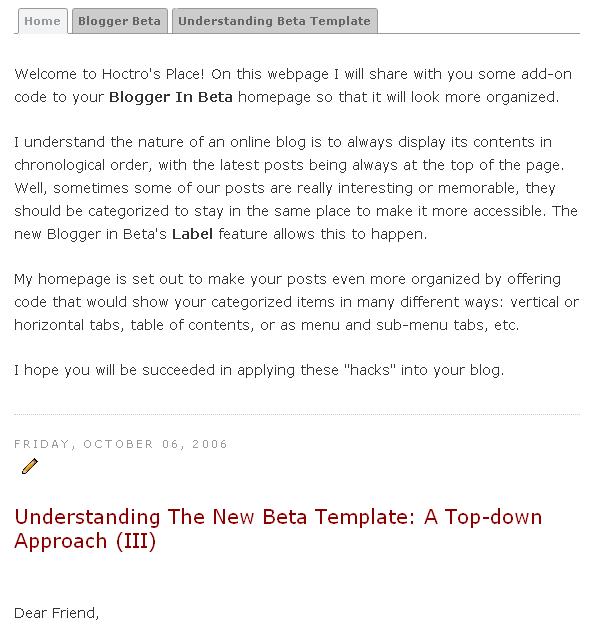
That's all it takes to have introductory paragraphs to show up on your blog. I hope you will able to make use of this hack.
Technical Comments:
Below are my technical comments, explaining the hack's logic. If you are interested in then read on. You're not required to understand my explanations to make it work on your blog.
1. I'm glad I am finally able to write another hack without the help of JavaScript. There is nothing wrong with JavaScript, it's just that stretching beta's own simple language is really fun. Indeed, beta's template doesn't need any Javascript at all, and it still looks great.
2. In Step 1: the "introduction" function, I create a loop, thus in effect make Blog1 loops through its post collection twice. That's how the introductory post can bubble up to be the first in the list. Inside the loop, I have two cases:
-If the reader is at homepage, then check to see if one of the post has the title of "Introduction." If so, prints the body only. This post must not have a label assigned.
- Next, I create another loop to go thru all the labels, and if one of them match the post's title, then also prints the body.
3. In Step 2, the goal is completely different. We want the introduction not to show up twice, yet at the same time it must be visible in the item page, if someone clicks on it from the archived list, hence the if-then-else structure.
I hope you will find some good use of both the hack and its source code as well.
Have a wonderful day.
Hoctro
(10/8/2006)
How to add a new CSS parameter to your Blogger template
Dear Friend,
Cecilia left a comment asking me if I know anything about changing the default background of the blog. As usual, I go looking for answers in several of my CSS books (Bulletproof Web Design, CSS CookBook, Eric Meyer on CSS, etc.) For this one, the answer is right on Chapter 1 of the "Bulletproof Web Design" book. So here it is, if you have one of the Minima designs, please alter the equivalent tags of the template's CSS portion like this:
body {
/*background:$bgcolor;*/
margin:0;
color:$textcolor;
font:x-small Georgia Serif;
font-size/* */:/**/small;
font-size: /**/small;
text-align: center;
background: $bgcolor url(http://photos1.blogger.com/blogger2/7873/821550570340913/1600/bg.gif) repeat-x top left;
}
/* Header
-----------------------------------------------
*/
#header-wrapper {
width:660px;
margin:0 auto 10px;
border-bottom:1px solid $bordercolor;
}
#header {
margin: 5px;
/*border: 1px solid $bordercolor;*/ text-align: center;
color:$pagetitlecolor;
}
/* Outer-Wrapper
----------------------------------------------- */
#outer-wrapper {
width: 660px;
margin:0 auto;
padding:10px;
text-align:left;
border: 1px solid $bordercolor;
font: $bodyfont;
background: #fff;
}
Discussion:
* In CSS, if you want some effects to be temporary disabled, use this /* xxxxxx */ format. Notice that a comment inside another comment is not acceptable, such as
/* xxx /* xxxxxx */ xxx */
*This line, in particular, adds a faded yellow picture to the top-left of the screen, and repeats that picture in the horizontal (x) direction.
background: $bgcolor url(http://photos1.blogger.com/blogger2/7873/821550570340913/1600/bg.gif) repeat-x top left;
* In addition, I tweak some code so that instead of the default two boxes around my title, now I only have a line at the bottom. Since the line is added with same color as the border's, I can change it visually with the "Font and Color" Editing option.
#header-wrapper {
width:660px;
margin:0 auto 10px;
border-bottom:1px solid $bordercolor;
}

* You can add more font and color variables to the template, and they will show up in the "Font and Color" design tab. What this means is that you will have many more options to play around with, not just the default ones from Blogger templates.
For example, I could create a new color variable (inside the <b:skin> tag at the front of the template):
<Variable name="commenttextcolor" description="Comment Text Color"
type="color" default="#999" value="#999999">
and it would show up in the "Font and Color" tab,

This new variable has a name so you can add later as $commenttextcolor in the actual CSS code, a description name for it to show up in "Font and Color" design tab, the type of "color", and a default and actual value. I think Blogger will write whatever your choice back to this "value" so your template is always up-to-date and independent of Blogger's database.
Now that you have a variable, you can apply that to the CSS code, just like any other default variables.
* For my Vietnamese blog, I have used the same code showing in this article to modify its appearance. Please take a look.
Have a nice day,
Hoctro (10/2006)
Blog: http://hoctro.blogspot.com/
Showing a Hint on Where to Post a Comment
Dear Friend,
Nanny22girls from Google Help Groups: Customizing Templates
asks if she could reword the comment line at the end of each post in index pages to say "Leave a comment here", along with the number of comments.
After looking into it, here is my quick fix:
In Template->Edit Html, check on "Expand Widget Templates" to view the entire template. Then, locate <b:includable id='post' var='post'>, and keep scrolling down to see this:
<span class='post-comment-link'>
<b:if cond='data:blog.pageType != "item"'>
<b:if cond='data:post.allowComments'>
<a class='comment-link'
expr:href='data:post.addCommentUrl' expr:onclick='data:post.addCommentOnclick'>
<b:if cond='data:post.numComments == 1'>1
<data:top.commentLabel/><b:else/><data:post.numComments/>
<data:top.commentLabelPlural/></b:if></a>
</b:if>
</b:if>
</span>
You are going to replace the code in bold with this code:
<b:if cond='data:post.allowComments'>
<b:if cond='data:post.numComments == 1'>1
Comment<!--<data:top.commentLabel/>-->
<b:else/><data:post.numComments/>
<data:top.commentLabelPlural/>
</b:if>
<a class='comment-link' expr:href='data:post.addCommentUrl'
expr:onclick='data:post.addCommentOnclick'>Leave your comment here</a>
</b:if>
Notice there is a space at the end of "1" before the code goes to the next line, and the same thing happens with the <data:post.numComments/>. If you don't leave a space, then there won't be a space between the number and the word comment (or comments.) Notice I fix the "1 Comments" bug too.
Here is the result:
and the "1 comments" bug:
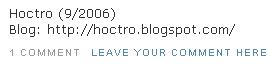
I think this enhancement really makes commenting more easier, since the link on where to add your comment now is easier to look for.
Have a nice day,
Hoctro (9/2006)
Blog: http://hoctro.blogspot.com/
Subscribe to:
Posts (Atom)