Dear Friend,
User interaction/feedback once again proved to be a great source of new ideas. Gareth Doutch, one of my tab's hack reader, asks me if I can turn the "Link List Widget" to show up first as a horizontal link list (like Hans' Beautiful Beta link at the top of his blog,) then possibly also as horizontal or vertical tabs, exactly like the way the popular hacks "Labels as horizontal/vertical tabs" present. My initial thought was that this could be done, and it sure does.
Without further ado, below are the instructions on how to apply the mod to your blog.
Instructions:
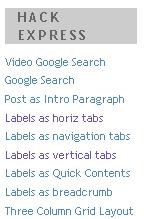
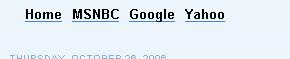
Step 0: Link List without any modifications
Here is a picture of an implemented link list widget without any modifications, I thought it would be nice to show it here so my readers know where I'm coming from, and the desire to make it more versatile by turning it into the three new versions:
Step 1: Adding the Link List code
In your "Edit template" window, add the code to the sidebar, where a line is highlighted, somewhere below the line
< b:section class='sidebar' ...
as shown:
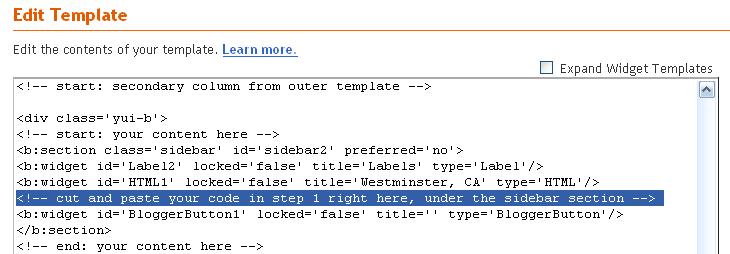
<b:widget id='LinkList1' locked='false' title='' type='LinkList'>
<b:includable id='main'>
<div id='tabsF'>
<ul>
<li><a expr:href='data:blog.homepageUrl'>
<span>Home</span></a></li>
<b:loop values='data:links' var='link'>
<li><a expr:href='data:link.target'><span>
<data:link.name/></span></a></li>
</b:loop>
</ul>
</div>
</b:includable>
</b:widget>
For example, if I add the above code to under the HTML1 widget, once I save the template, I will see only this one highlighted line (since Blogger hides the code unless you "expand" the "expand widget template" checkbox".)
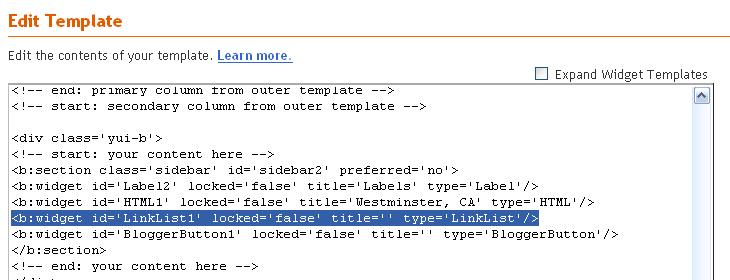
The widget is created, now we need some contents. (Or in my case, the baby is born, now he needs milk! :-)
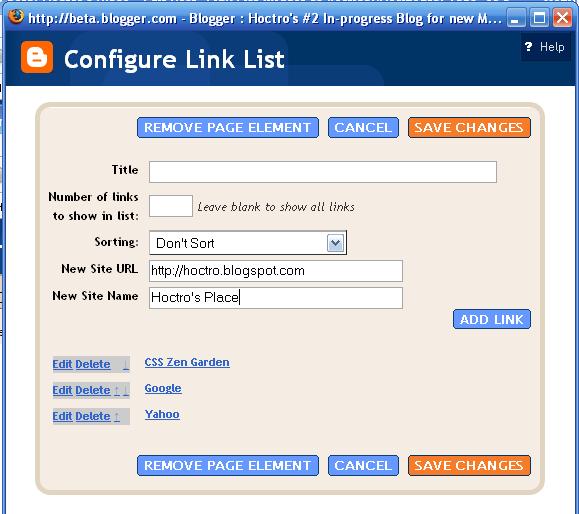
Step 2: Adding links to your new Widget
After you've done with set 1, don't forget to add things to your new link list widget for it to show up. To do that, choose "Edit" on the "Link List" box:
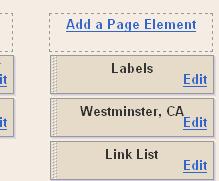
Now add your links and their titles:
Important Note:
To have horizontal tabs for your favorite labels, copy the link you click when selecting a label as your URL. It should look like this format:
http://yourblog.blogspot.com/search/label/your label
For example, here's the URL for my Simple Hacks label:
http://hoctro.blogspot.com/search/label/Simple%20Hacks
Now you are ready to turn your regular list in to Tabs, or a horizontal list. Again, the "cute" thing about this hack, I think, is that it allows you to add, remove, or edit your links without going inside the template code.
Step 3: Turning Link List into Tabs
a. Making a Link List Widget as Horizontal Tabs
Adding the CSS code to the template for the linklist to turn into tabs. You can read here on how to add. Remember, everything about the CSS is the same, we just want to add our own links as tabs, instead of using labels. hence disregard all the instructions about "labels" on that post. Don't forget to change the id="tabsF" in step 2 to whatever tab you like.

b. Making a Link List Widget as Vertical Tabs
Adding the CSS code to the template. You can read here on how to add it. Remember, everything about the CSS is the same, we just want to add our own links as tabs, instead of using labels. Don't forget to change the id="tabsF" in step 2 to whatever tab you like.

c. Link List Widget as Horizontal List of Items
Paste this code to the CSS portion of your template (above the end skin tag,) then change the div id in the horizontal portion above from "tabsF" to "horiz".
#horiz {
float:left;
width:100%;
}
#horiz ul {
margin:0;
list-style:none;
}
#horiz li {
display:inline;
}
#horiz a {
float:left;
}
#horiz a span {
float:left;
display:block;
padding:30px 5px 30px 5px;
color:#000;
}
Cheers,
Hoctro
(10/31/06)