Dear Friend,
Continuing on my quest of maximizing the usage of Beta's new Label feature, this time I will show you how to turn Labels into Navigation Tabs.
The Yahoo! Design Pattern Library identifies the Navigation Tabs pattern as "the" solution when the site has only some few main categories with their titles shorts and predictable, etc. A prime, everyday-use example for us, as you might have guessed, is no other than Blogger's (classic and beta) navigation tabs!
Based on an online example from that pattern's description, I was succeeded in turning our labels into similar navigation tabs:

As you can see, the prominent advantage of this tab over my first "horizontal tab" hack is the clear indication of what the user is seeing, with the active tab in light grey color, and the sub-label in bold.
Following are the steps on how to convert:
Step 1: Adding CSS code to the end of the template's CSS portion
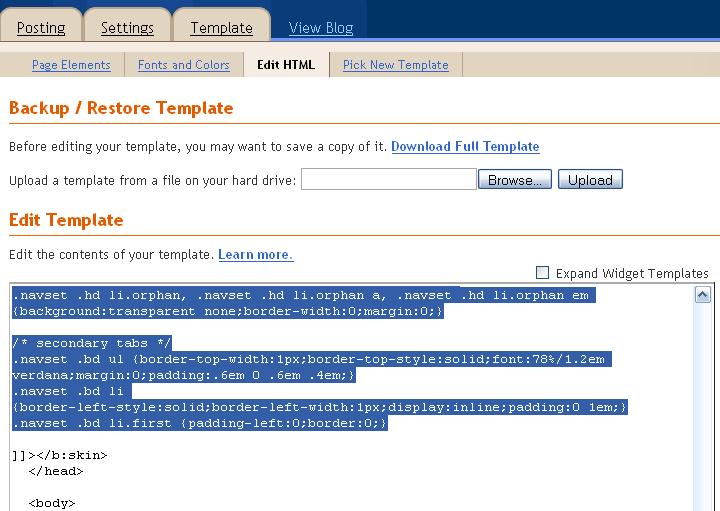
/* base styles for extending/overriding */
/* primary tabs */
.navset {border-bottom:1px solid #999;}
.navset .hd li em {font-weight:bold;}
.navset .hd li a {color:#666;}
.navset .hd li.on strong, .navset .hd li.on strong a {color:#999;} /* selected tab */
.navset .hd li.on strong {background-color:#F2F3F5;border-bottom:1px solid #F2F3F5;} /* border-color should match selected color */
.navset .hd li.orphan, .navset .hd li.orphan a {color:#999;}
/* bg images, defaults to #999 border-color on white bg */
.navset .hd li a, .navset .hd li strong {background:#ccc url(http://us.i1.yimg.com/us.yimg.com/i/us/nt/el/tb/tr_999.gif) no-repeat top right;}
.navset .hd li em {background:transparent url(http://us.i1.yimg.com/us.yimg.com/i/us/nt/el/tb/tl_999.gif) no-repeat;}
/* secondary tabs */
.navset .bd ul {background-color:#F2F3F5;border-color:#999;}
.navset .bd li, .navset .bd li a {color:#06c;}
.navset li.on, .navset li.on strong {font-weight:bold;}
.navset .bd li {border-color:#ccc;} /* pipe divider */
/* end base styles */
/* Network tab standards, shouldn't change */
/* shared pri and sec */
.navset {width:100%;} /* IE: width */
.navset a {text-decoration:none;}
.navset ul, .navset li {margin:0;padding:0;list-style:none;}
.navset li {float:left;display:inline;}
.navset li a:hover {text-decoration:underline;}
.navset ul:after {clear:both;content:'.';display:block;height:0;visibility:hidden;} /* clear non-IE */
.navset ul {zoom:1;} /* clear IE */
/* primary tabs */
.navset .hd ul {font:bold 78%/1.2em verdana;margin-bottom:-1px;padding-left:.3em;position:relative;} /* IE quirks mode: relative */
.navset .hd li {margin-right:.33em;padding:0;}
.navset .hd li.on strong a {cursor:default;}
.navset .hd li a, .navset .hd li strong, .navset .hd li em {display:block;}
.navset .hd li a, .navset .hd li strong {*display:inline-block;} /* IE: 100% clickable */
.navset .hd li em {font-style:normal;padding:.5em .6em;}
.navset .hd li.orphan, .navset .hd li.orphan a, .navset .hd li.orphan em {background:transparent none;border-width:0;margin:0;}
/* secondary tabs */
.navset .bd ul {border-top-width:1px;border-top-style:solid;font:78%/1.2em verdana;margin:0;padding:.6em 0 .6em .4em;}
.navset .bd li {border-left-style:solid;border-left-width:1px;display:inline;padding:0 1em;}
.navset .bd li.first {padding-left:0;border:0;}
Step 2: Add the Label Widget to the content (blog) area
First, make sure "Expand Widget Templates" is checked. Then, locate the widget Blog1, and cut-n-paste this code (seen below) right in front of it.

<b:widget id='Label2' locked='false' title='Labels' type='Label'>
<b:includable id='main'>
<div class='menuHack'>
<div id='menuList'>
</div>
</div>
<script language='javascript' type='text/javascript'>
var label = "";
var text2 = "";
var currentLabel = "";
var activeLabel = "";
var firstLine = "";
var secondLine = "";
var drawTop = false;
var firstSub = false;
var currentUrl = "<data:blog.url/>";
var arr = new Array(2);
firstLine = firstLine + "<div class='navset' id='nav'>";
firstLine = firstLine + "<div class='hd'><ul>";
<b:if cond='data:blog.url == data:blog.homepageUrl'>
firstLine = firstLine + "<li class='on' title='selected'><a expr:href='data:blog.homepageUrl'><strong><em>Home</em></strong></a></li>";
<b:else/>
firstLine = firstLine + "<li><a expr:href='data:blog.homepageUrl'><em>Home</em></a></li>";
</b:if>
secondLine = secondLine + "<div class='bd'><ul>";
<b:loop values='data:labels' var='label'>
label = "<data:label.name/>";
text2 = label.charAt(label.length - 1);
if (text2 != '.') {
arr = label.split("*",2);
if (arr[0] != currentLabel) {
currentLabel = arr[0];
/*var arr2 = new Array(2);
arr2 = arr[0].split("",2);*/
if (currentUrl.search(arr[0]) != -1) {
activeLabel = label;
if (drawTop == false) drawTop = true;
firstLine = firstLine + "<li class='on' title='selected'><a expr:href='data:label.url + "?max-results=100"'><strong><em>" + arr[0].replace(/_/g,' ') + "</em></strong></a></li>";
}
else
firstLine = firstLine + "<li><a expr:href='data:label.url + "?max-results=100"'><em>" + arr[0].replace(/_/g,' ') + "</em></a></li>";
}
if (arr[1] != undefined && currentUrl.search(arr[0]) != -1) {
var secClass = "";
if (firstSub == false) {
firstSub = true;
secClass = "class='first'";
}
if (currentUrl.search(arr[1]) != -1)
secClass = "class='on'";
secondLine = secondLine + "<li " + secClass + "><a expr:href='data:label.url + "?max-results=100"'>" + arr[1].replace(/_/g,' ') + "</a></li>";
}
}
</b:loop>
firstLine = firstLine + "</ul></div>";/*1st line*/
secondLine = secondLine + "</ul></div>";/*2nd line*/
arr = activeLabel.split("*",2);
if (arr[1] != undefined && currentUrl.search(arr[0]) != -1)
firstLine = firstLine + secondLine;
firstLine = firstLine + "</div>";/*navset*/
obj = document.getElementById('menuList');
obj.innerHTML = firstLine;
</script>
</b:includable>
</b:widget>
Step 3: Label/Re-label your posts
To make this hack works, you need to re-label your posts. There are three rules:
1. If you don't want to see a label or sub-label, put a period (".") at the end.
2. Labels/Sub-labels are separated by a star ("*"). For example, if you like to have a common tab named "Art", with sub-menu such as "Paintings", "Architectural", "Decor", etc., then you should have posts with labels sucha as Art*Paintings, Art*Architectural, Art*Decor, etc. The key is to keep the tab name the same ("Art".)
3. Words are separated by underlines ("_"), this step must be followed so that the current selected label could be shown in bold.
For example, this is a valid tag: "Modern_Art*Pablo_Picasso", and not this "Modern Art*Pablo Picasso".
Discussion:
-By defaults, labels are sorted alphabetically. Don't change this default (using widget visual editing.)
-Even though underscores are in your labels, the main or sub labels won't show them but replace with spaces instead.
-As always, create a new blog to test this hack before applying it to your main blog. Don't forget to make a back-up of your main blog's template regularly.
- I have my test blog here for you to reference on how to name labels the correct way in order for the labels to show as tabs:
http://blogger-beta-from-ground-up.blogspot.com/
-If you can follow my logic in Javascript, you will see that I try my best in making the hack a "one-loop" algorithm. Originally, I had 2 loops, one for the upper tabs, and one for the sub-labels. Eventually, I realize I could use two strings for two divs, and only append the second string if the sub-labels present. I also learned quite a few JavaScript tricks from this one, such as one to replace underscore with a space, searching a string inside another, etc. Overall, it's a noteworthy hack to look at and make improvements upon.
That's it. I hope you will find this hack useful.
Have a wonderful day,
Hoctro (9/24/2006)
Blog: http://hoctro.blogspot.com/