Hacking Technique: On Making a New Hack


Dear Friend,

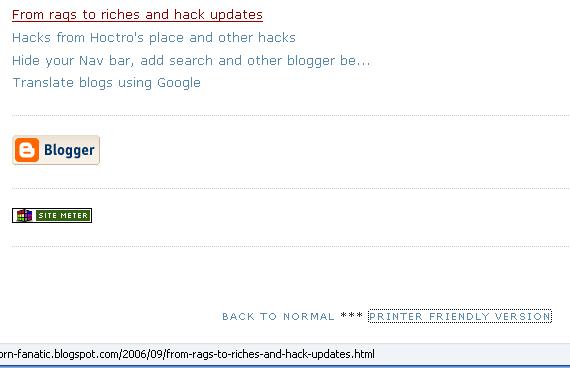
This weekend I was working on a brand new hack code name "Site Map", that would let you see all of your posts (theoretically up to 999 possible posts) as a list of all labels and their belonging posts. Here is an example of such a list:

...
Art
    *Picasso's Guernica
    *Da Vinci's Mona Lisa
    *Dali: What do we know about his works?
Math
    *How to solve a quadratic equation?
    *Math in College: how tough it is?
    *Math in everyday use.
Soccer
    *The Italians Wins the World Cup for the fourth time!

and so on.

Well, things go really well, and I'm at a good stopping point. What I have at the moment is a list of all the possible posts in a blog, in chronological order. You can click on this link, or look at my beta playground and click on the "Listing of All Posts" to see the effect.

I would not consider this as a hack, but I'd like to make some comments on the code on the technical side of things, in a hope that some of my readers would be interested in this and turn it into completely unexpected new hack(s). So, if you are interested, please read on.


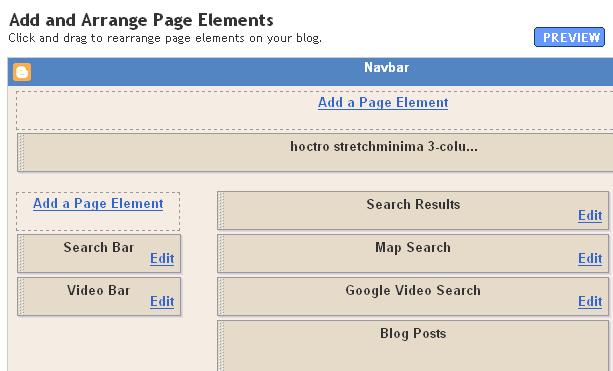
Here is my logic. First, I'm going to get all the posts in a blog. I think Blogger allows to retrieve up to 999 posts on a query.

Now, the return data would be as a part of the Blog in the form of data:posts. This means I cannot create a new widget to retrieve and process the data, but I have to get it from the Blog1 widget itself. To have a clean cut between the new code and the old one, I will sub-out all the code to a function (Blogger calls this an includable), then in Blog1's main includable I will call this function to do the job. Later on I have to do something so the rest of the full (999) posts' contents will not show up and slow down your computer, but for testing purpose, it's fine to see both new and current code.

Here is the call to the new "siteMap" function:

... 

<b:includable id='main' var='top'>
  <div id='blog-posts'>
    <b:include name='siteMap' values='data:posts'/>

...


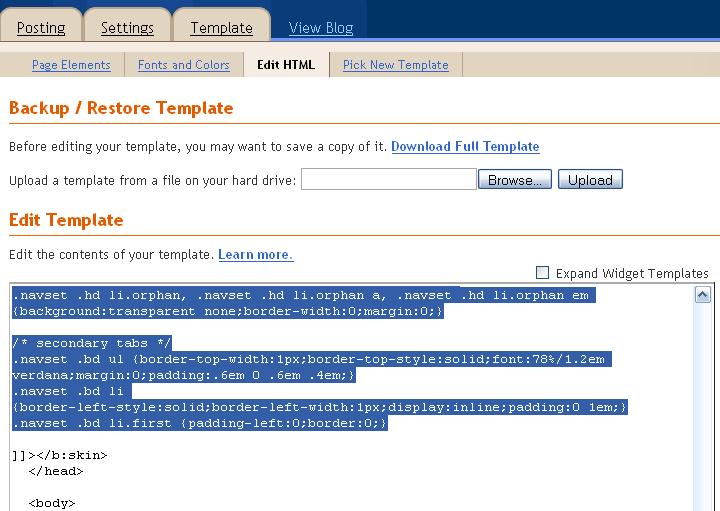
Below is the current listing of the function. I will explain more in details. (If you want to try this of course you must edit away all the numbers at the front of each line.)


1 :<b:includable id='siteMap' var='data:posts'>
2 :
3 :   <div class='sitemapHack'>
4 :     <div id='siteMapList'>
5 :     </div>
6 :   </div>
7 :<script language='javascript' type='text/javascript'>
8 :
9 :  var currentUrl = "<data:blog.url/>";
10:  if (currentUrl.search("max-results=999") != -1) {
11:  var firstLine = "";
12:  var tempLabel = "";
13:  <b:if cond='data:blog.pageType == "index"'>
14:    <b:if cond='data:blog.url != data:blog.homepageUrl'>
15:<!-- second part : filling in data based on tags -->
16:       firstLine = firstLine + "<ul>";
17:      <b:loop values='data:posts' var='post'>
18:          <b:if cond='data:post.title'>
19:              firstLine = firstLine + "<li><a expr:href='data:post.url'><data:post.title/></a></li>";
20:          </b:if>
21:      </b:loop>
22:      firstLine = firstLine + "</ul>";/*1st line*/
23:    </b:if>
24:  </b:if>
25:     obj = document.getElementById('siteMapList');
26:     obj.innerHTML = firstLine;
27:}
28:</script>
29:</b:includable>


Line 1 declares the function as siteMap, with the passing value is the collection of all the posts.

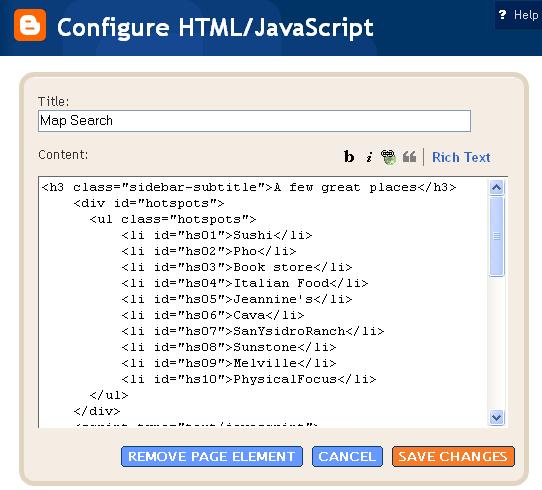
Line 3 thru 6
contain the placeholder of the hack's contents. We will keep adding text to a variable declared in line 11, and at the end write all data to this div. As mentioned in my previous article entitled "JavaScript, you completed me!", this portion of the code I follow exactly from Ramani of Hackosphere.

Line 7 declares that we are entering Javascript, and line 27 exits this effect. While we are in JavaScript, you cannot write something like <li> and expect the code to pick this up and turn it into real html code. What you have to do is to write all of that HTML code to a string variable, as we shall see shortly.

Line 9 contains the secret of JavaScript/Beta integration. Whatever inside the two double quotes will turn into a string and is assigned to the variable currentURL. A look at the runtime code confirms this fact.


In fact, by reading the generated source code, I was able to find out many bugs, while programming the code in Beta's HTML edit tool.

Line 10 performs a search to see if the text max-results=999 is inside the currentURL variable (if it's different than -1 then it is, because the returning value indicated the location of the first occurence if there is a match.)

Now that it's matched, line 11 & 12 define some blank texts, while line 13 & 14 perform the checks to see if this is the archive/label kind of returned posts. As you might have known, there are three possible kinds of data that data:posts collection represents. If you are in homepage, data:posts represents the contents of all the posts you decided to show in the front page, whether it is one or ten posts. On the other hand, if you select on a label or a month/day/year archived link, data:posts represents all the possible posts resulting from that query. Finally, if you click on a link to the post, data:posts represents the actual post, so there would be exactly one (1) post in the collection.

In Beta templating language, there aren't any AND or OR logic for you to combine the two conditions into one if statement, so I had to make two if statements as shown in line 13 & 14. If the current page is an indexed type AND it's not at the same time the front page, then we hit the gold mine!

Line 16 starts the string text with an ul tag.

Line 17 thru line 21 set up a nice loop where each post's name is tugged inside its link, in order for you to be able to click on it to lead you to the right item post. In line 19 firstLine variable keeps adding more titles onto itself. In the generated code, the result is super lightweight chunk of code, since we only add Blogger to pass back titles and url only. You will also notice that the b:loop logic is executed on the server side, since what we see on the client side (our generated code) is the result of the content of each loop.


Noticed in line 18, the title is drawn only if it exists.

Once the loop is completed, we close the ul tag and the ifs as in line 21 thru 24.

As previously noted, we look for the unique id siteMapList, then write the content to it in line 25 & 26.

Now that the code is completed, to call it we use this link:

http://blogger-beta-from-ground-up.blogspot.com/search/label/?max-results=999

That was all I did for the posts to show. My next step for this little hack project is to look for all the unique labels contained in the posts, then have a for-loop going through all the found labels and prints all all the posts that match it. Because of this, if you have multiple labels for a particular post, it will show up many times, one for each label. That is acceptable, I think. I personally only assign one label per post right now in my main blog, but in the future, if I find a good benefit, I won't hesistate to add more labels.

Wow! I finally did it! I'm at the end of my explanations!

Have a wonderful day and see you next time, when I present you the completed "Site map" hack.

Hoctro (9/30/2006)
Blog: http://hoctro.blogspot.com/

My Blog Has Just Made It to "Blogs Of Note"!


Dear Friend,

I'm happy to tell you that I have just made it to the Blogs of Note. This is quite an honor and unexpected. I feel like I just have got my own star on Hollywood Boulevard!


I would like to take this opportunity to thank my friends (Ramani, Vivek, Hans, Avatar, John (Freshblog), and others) who have been helping one way or another in shaping the contents of my site. You can check out their sites from my "interesting links" on the sidebar.

Ramani is right. My simple, free counter I set up from "Sitemeter" jumped drastically from 100 a day, which is not a small number by any means, to 2400 (!) in just one day! This is incredible!

For my new readers, welcome!!!! Feel free to check out what's on my site, and leave your comments here on what other topics you would like me to write about: more hacks, hack suggestions, more Blogger Beta how-to tutorials, etc. I'm planning to write an in-depth series on the internal working of the new beta template. This will take 4, 5 articles or more. So stay tuned.

Have a wonderful day and check back often at my site and my friends', as we have quite a few interesting Beta hacks to offer.

Hoctro (9/2006)
Blog: http://hoctro.blogspot.com/

Adding Map, Text and Video Google Searches to your Blog


Update: For people whom are looking for three-column templates, I have 8 new Minima templates, using the same CSS code from Blogger

Look for them from this article: Ready-to-use Three-Column Template: Minima Templates

Thanks,


Dear Friend,

Below is my straight-to-the-point instructions on how to install the API Google Search types (video, text, and map) to your blog. The strong point of my fully revised articles is to provide you with more options to change the search parameters without going much inside the template.

Step 1: Get the API key from http://code.google.com/apis/ajaxsearch/signup.html. It's quite simple to get one, really.

Step 2: Add the CSS and code to the header, right after the ] ] ></b:skin> tag.
Replace the text in bold in 2 places with you own API key.

To make your installation/test easier, I upload my template here, so you can download to your Pc, then upload it to your blog in Edit HTML->Upload, and safely skip step 2->4. (But you still have to replace the key to your own.)


<script

src='http://www.google.com/maps?file=api&amp;v=2&amp;key=wW9cday6o7K3g' type='text/javascript'/>
<script

src='http://www.google.com/uds/api?file=uds.js&amp;v=1.0&amp;key=wW9cday6o7K3g' type='text/javascript'/>
<link href='http://www.google.com/uds/css/gsearch.css' rel='stylesheet' type='text/css'/>
<link href='http://www.google.com/uds/css/gsearch_darkgrey.css' rel='stylesheet' type='text/css'/>

<!-- video search solution -->
<script src='http://www.google.com/uds/solutions/videosearch/gsvideosearch.js' type='text/javascript'/>
<link href='http://www.google.com/uds/solutions/videosearch/gsvideosearch.css' rel='stylesheet' type='text/css'/>

<!-- videoBar solution -->
<script src='http://www.google.com/uds/solutions/videobar/gsvideobar.js' type='text/javascript'/>
<link href='http://www.google.com/uds/solutions/videobar/gsvideobar.css' rel='stylesheet' type='text/css'/>

<!-- map search solution -->
<script src='http://www.google.com/uds/solutions/mapsearch/gsmapsearch.js' type='text/javascript'/>
<link href='http://www.google.com/uds/solutions/mapsearch/gsmapsearch.css' rel='stylesheet' type='text/css'/>

<style type='text/css'>
/* primary colors */
.app_gsvsc { color : rgb(153, 170, 221); }
.search-form-complete_gsvsc div.search-form-save_gsvsc { color : rgb(170, 221, 153); }
div.search-form-save_gsvsc { color : #202020; }

/* selected tag */
div.tag-selected_gsvsc { color : rgb(170, 221, 153); }

/* hover colors */
div.more_gsvsc:hover { color : rgb(170, 221, 153); }
div.tag-control_gsvsc:hover { color : rgb(170, 221, 153); }
.search-form-complete_gsvsc div.search-form-save_gsvsc:hover { color : rgb(170, 221, 153); }
.footerBox_gsvsc a:hover { color : rgb(170, 221, 153); }
.playerBox_gsvsc a.title_gsvsc:hover { color : rgb(170, 221, 153); }

/* secondary colors */
div.more_gsvsc { color : rgb(204, 204, 204); }
div.tag-control_gsvsc { color : rgb(204, 204, 204); }
.searchForm_gsvsc { color : rgb(204, 204, 204); }
.search-form-input_gsvsc { color : rgb(204, 204, 204); }
td.edit-form-input_gsvsc input { color : rgb(204, 204, 204); }
div.edit-form-submit-box_gsvsc { color : rgb(204, 204, 204); }
.footerBox_gsvsc a { color : rgb(204, 204, 204); }
.playerBox_gsvsc a.title_gsvsc { color : rgb(204, 204, 204); }
div.edit-tag_gsvsc { color : rgb(204, 204, 204); }

/* special settings, not called out in standard color overrides */
.tiny-results_gsvsc div.tiny-video-result_gsvsc { border-color : #000000; }
.results_gsvsc div.video-result_gsvsc { border-color : #000000; }
.search-form-input_gsvsc {
color : #676767;
background-color : #e0e0e0;
}

/* mapsearch styles */
#mapsc { width : 100%; }
#mapsc .gsmsc-idleMapDiv { height : 260px; }
#mapsc .gsmsc-mapDiv { height : 260px; }
#mapsc .gs-localResult { color : #676767; }

#mapsc a:link,
#mapsc a:visited { color : #0000cc; }

#hotspots {
padding-left : 8px;
}

#hotspots ul.hotspots {
margin : 0px;
margin-bottom : 4px;
padding : 0px;
}

#hotspots ul.hotspots li {
text-indent : 0px;
font:bold 70%/1.4em "Trebuchet MS",Trebuchet,Arial,Verdana,Sans-serif;
text-transform:uppercase;
display : inline;
padding : 0px;
margin-right : 8px;
cursor : pointer;
}

#hotspots ul.hotspots li:hover {
text-decoration : underline;
}

h3.sidebar-subtitle {
margin:.25em 0 .25em;
font:bold 75%/1.4em "Trebuchet MS",Trebuchet,Arial,Verdana,Sans-serif;
text-transform:uppercase;
letter-spacing:.2em;
color:#777;
}

/* center column search stuff */
#searchform { width : 100%; margin-bottom : 8px;}
#searchControl .gs-result .gs-title,
#searchControl .gs-result .gs-title * {
color : rgb(153,170,221);
}

#searchControl .gsc-resultsHeader {
border-bottom-color : rgb(99,99,99);
}

#searchControl .gsc-control {
width : 100%;
}

#searchControl .gsc-tabHeader.gsc-tabhActive {
border-left: 1px #636363;
border-right: 1px solid #636363;
border-top: 2px solid rgb(153,170,221);
background: #e9e9e9;
}

#searchControl .gsc-tabHeader.gsc-tabhInactive {
border-left: 1px solid black;
border-right: 1px solid black;
border-top: 2px solid #636363;
background: black;
}
</style>
  <script type='text/javascript'>
    var mapSearch;
    var videoSearch;
    var coreSearch;
    var videoBar;

    function SolutionLoad() {

      var videoOptions = {
        twoRowMode : true,
        startupDelay : 150
      }
      videoSearch = new GSvideoSearchControl(
        document.getElementById("videosc"),         // container
        defaultTags,                                // default tag array
        null,                                       // optional load function
        null,                                       // optional save function
        videoOptions                                // optional options
        );


      // video bar
      var vbOptions = {
          largeResultSet : true,
          master : videoSearch
          }
      videoBar = new GSvideoBar(document.getElementById("videoBarDiv"), null, vbOptions);
      videoBar.execute("mac vs pc ad");

    // set title to the Googleplex and the link to
    // the Google corporate information page
    // set the hotspot list to the list above
    var mapOptions = {
      title : "Hoctro's Hangout Place",
      url : "http://en.wikipedia.org/wiki/Huntington_Beach,_California",
      hotspots : hotspotsList
      };

    // create the map search control
    mapSearch = new GSmapSearchControl(
          document.getElementById("mapsc"),
          "Huntington Beach, CA",
          mapOptions
          );


    var controlRoot = document.getElementById("searchControl");

    // create the search control
    coreSearch = new GSearchControl();
    coreSearch.setLinkTarget(GSearch.LINK_TARGET_SELF);
    coreSearch.setResultSetSize(GSearch.LARGE_RESULTSET);

    // prep for decoupled search form
    var searchFormElement = document.getElementById("searchform");
    var drawOptions = new GdrawOptions();
    drawOptions.setSearchFormRoot(searchFormElement);
    drawOptions.setDrawMode(GSearchControl.DRAW_MODE_TABBED);

    // populate - web, this blog, all blogs
    var searcher = new GwebSearch();
    searcher.setUserDefinedLabel("The Web");
    coreSearch.addSearcher(searcher);

    searcher = new GblogSearch();
    searcher.setUserDefinedLabel("Blogsphere");
    coreSearch.addSearcher(searcher);

    searcher = new GblogSearch();
    searcher.setSiteRestriction("http://googleajaxsearchapi.blogspot.com/");
    searcher.setUserDefinedLabel("Ajax Search Blog");
    coreSearch.addSearcher(searcher);

    searcher = new GblogSearch();
    searcher.setSiteRestriction("http://googleblog.blogspot.com/");
    searcher.setUserDefinedLabel("Google Blog");
    coreSearch.addSearcher(searcher);

    searcher = new GwebSearch();
    searcher.setSiteRestriction("http://www.blogger.com/");
    searcher.setUserDefinedLabel("Blogger");
    coreSearch.addSearcher(searcher);

    coreSearch.draw(controlRoot, drawOptions);

    }

    function doCoreSearch(q) {
      coreSearch.execute(q);
    }

    function doMapSearch(q) {
      mapSearch.newSearch(q);
    }

    function doVideoSearch(q) {
      videoSearch.vsf.input.value = q;
      videoSearch.searchByString(videoSearch.vsf);
    }

    registerLoadHandler(SolutionLoad);

    function registerLoadHandler(handler) {
      var node = window;
      if (node.addEventListener) {
        node.addEventListener("load", handler, false);
      } else if (node.attachEvent) {
        node.attachEvent("onload", handler);
      } else {
        node['onload'] = handler;
      }
      return true;
    }
  </script>


Step 3: Add these new 5 widgets to your blog, following instructions here, section B.4.


<b:widget id='HTML31' locked='false' title='Search Bar' type='HTML'>
<b:includable id='main'>
  <b:if cond='data:title != ""'>
    <h2 class='title'><data:title/></h2>
  </b:if>
  <div class='widget-content'>
    <div id='searchform'>Loading...</div>
  </div>
  <b:include name='quickedit'/>
</b:includable>
</b:widget>
<b:widget id='HTML32' locked='false' title='Video Bar' type='HTML'>
<b:includable id='main'>
  <b:if cond='data:title != ""'>
    <h2 class='title'><data:title/></h2>
  </b:if>
  <div class='widget-content'>
    <div id='videoBarDiv'>Loading...</div>
  </div>
  <b:include name='quickedit'/>
</b:includable>
</b:widget>
<b:widget id='HTML33' locked='false' title='Search Results' type='HTML'>
<b:includable id='main'>
  <b:if cond='data:title != ""'>
    <h2 class='title'><data:title/></h2>
  </b:if>
  <div class='widget-content'>
    <div id='searchControl'>Loading...</div>
  </div>
  <b:include name='quickedit'/>
</b:includable>
</b:widget>
<b:widget id='HTML34' locked='false' title='Map Search' type='HTML'>
<b:includable id='main'>
  <b:if cond='data:title != ""'>
    <h2 class='title'><data:title/></h2>
  </b:if>
  <div class='widget-content'>
    <div id='mapsc'>Loading...</div>
    <data:content/>
  </div>

  <b:include name='quickedit'/>
</b:includable>
</b:widget>
<b:widget id='HTML35' locked='false' title='Google Video Search' type='HTML'>
<b:includable id='main'>
  <b:if cond='data:title != ""'>
    <h2 class='title'><data:title/></h2>
  </b:if>
  <div class='widget-content'>
    <div id='videosc'>Loading...</div>
    <data:content/>
  </div>

  <b:include name='quickedit'/>
</b:includable>
</b:widget>


Step 4: Move around the widgets in Page Elements so that it looks like this. This is how we have a little freedom in moving the search widgets around if need be.


Notice sometimes you'll see this prompt, don't worry, just click OK.


To enhance our flexibilities in changing search items for the map and the video bars, two more steps are required.

Step 5: Adding contents to the Map Widget: cut and paste this code to the content of the Map Search widget:


<font color="brown">
<h3 class="sidebar-subtitle">A few great places</h3>
    <div id="hotspots">
      <ul class="hotspots">
          <li id="hs01">Sushi</li>
          <li id="hs02">Pho</li>
          <li id="hs03">Book store</li>
          <li id="hs04">Italian Food</li>
          <li id="hs05">Jeannine's</li>
          <li id="hs06">Cava</li>
          <li id="hs07">SanYsidroRanch</li>
          <li id="hs08">Sunstone</li>
          <li id="hs09">Melville</li>
          <li id="hs10">PhysicalFocus</li>
      </ul>
    </div>
    <script type="text/javascript">
      var hotspotsList = [
        { element : document.getElementById("hs01"), query : "Sushi" },
        { element : document.getElementById("hs02"), query : "Pho" },
        { element : document.getElementById("hs03"), query : "Book Stores" },
        { element : document.getElementById("hs04"), query : "Italian Food" },
        { element : document.getElementById("hs05"), query : "Jeannine's" },
        { element : document.getElementById("hs06"), query : "Cava Restaurant & Bar" },
        { element : document.getElementById("hs07"), query : "San Ysidro Ranch" },
        { element : document.getElementById("hs08"), query : "Sunstone Winery" },
        { element : document.getElementById("hs09"), query : "Melville Winery" },
        { element : document.getElementById("hs10"), query : "Physical Focus" }
        ];
    </script>
</font>


Step 6: Adding contents to the Video Widget: cut and paste this code to the content of the Video Search widget:


<font color="brown">
<script type="text/javascript">
  var defaultTags = [
    {query : "feed:top100",label : "itshot"},
    { query : "feed:top100new",label : "itsnew"},
    { query : "monkey boy ballmer", label : "steveb"},
    {query : "mac pc ads",label : "mac"},
    {query : "mtv"},
    { query : "big wave surfing",label : "waves"},
    {query : "christina aguilera type:music_video",label : "christina"},
    { query : "jessica simpson",label : "jessica"},
    {query : "vw gti"},
    {query : "ferrari f1",label : "f1"},
    { query : "abba",label : "abba"},
    { query : "type:gpick",label : "picks"
    }
  ];
</script>
</font>


That's it! We're done!

Here's my test site with the new search widgets: http://hoctro-stretchminima.blogspot.com/


To add new locations, go to step 5 and 6 and change at will. I'll let you exercise your brain on how to add a new line item to the search.

Discussion:

- This map uses a central location to look for the searches. For example, I use the city of Huntington Beach, California as my center point, then clicking on Starbuck link, I was able to locate all the coffee shops around the city.


    // create the map search control
    mapSearch = new GSmapSearchControl(
          document.getElementById("mapsc"),
          "Huntington Beach, CA",
          mapOptions
          );

-Under the main map, you will see the forward or backward buttons. Clicking on these will give you all the locations near the blog's central point.


- The Core Search is also really cool, in that you can do many kind of searches from many different servers, the results will be shown in tabs in front of your main content (that is where I put in the div in step 3.) Make sure you change the CSS code to make the tabs look more decent.


I would like to thank Mr. Mark Lucovsky for putting together these hacks and making all of the above code available for us bloggers to use.

Cheers,

Hoctro
Blog: http://hoctro.blogspot.com/


Update:

My article is mentioned in Buzz today (9/26/06 11:30 AM Pacific time). Thanks, Eric and the Beta Blogger team. Keep up your great work.


Update 2 (11/24/06):


My blog is mentioned in the API Search Blog. Thank you very much!

Hacking Technique: Feeds on Front Page Only


Dear Friend,

It seems to me that the Blogger Beta team fixed the problems with comment feeds already. I tested it and it works fine. I noticed something really cool and logical too. Instead of using the blog ID (do you know off the top of your hat your site ID? I don't,) they utilize your homepage address now. So, for now my feeds are, in case anyone cares to know:

  • posts: http://hoctro.blogspot.com/feeds/posts/full

  • Comments: http://hoctro.blogspot.com/feeds/comments/full


Now, here's how I let these feeds shown (by using 2 feed widgets) on my front page only, and not my label/archived/item pages. A very simple but useful trick is employed: put an "if" check to see if the current page is the homepage or not, if so then proceed, otherwise nothing got shown.

Add two lines right inside the main includable:

* Right after the line: <b:includable id='main'>
add this line: <b:if cond='data:blog.url == data:blog.homepageUrl'>
* Right before the line: </b:includable>
add this line: </b:if>

Here is the example I put on the posts feed:


<b:widget id='Feed1' locked='false' title='Latest Posts' type='Feed'>
<b:includable id='main'>
  <b:if cond='data:blog.url == data:blog.homepageUrl'>
    <h2><data:title/></h2>
    <div class='widget-content'>
    <ul id='feedItemListDisplay'>
      <b:loop values='data:feedData.items' var='i'>
        <li>
          <span class='item-title'>
            <a expr:href='data:i.alternate.href'>
              <data:i.title/>
            </a>
          </span>
          <b:if cond='data:showItemDate'>
            <b:if cond='data:i.str_published != ""'>
              <span class='item-date'>
                 - <data:i.str_published/>
              </span>
            </b:if>
          </b:if>
          <b:if cond='data:showItemAuthor'>
            <b:if cond='data:i.author != ""'>
              <span class='item-author'>
                 - <data:i.author/>
              </span>
            </b:if>
          </b:if>
        </li>
      </b:loop>
    </ul>
    <b:include name='quickedit'/>
    </div>
    </b:if>
  </b:includable>
</b:widget>


For that purpose, any widget you want to show only on the front page you can use this trick.

Have a nice day,

Hoctro (9/2006)
Blog: http://hoctro.blogspot.com/


PS: While we're on the subject, if we don't want to see something in the front page, then just change the equal (==) check to become NOT equal (!=),

<b:if cond='data:blog.url != data:blog.homepageUrl'>


Hacking Technique: Navigation Tabs


Dear Friend,

Continuing on my quest of maximizing the usage of Beta's new Label feature, this time I will show you how to turn Labels into Navigation Tabs.

The Yahoo! Design Pattern Library identifies the Navigation Tabs pattern as "the" solution when the site has only some few main categories with their titles shorts and predictable, etc. A prime, everyday-use example for us, as you might have guessed, is no other than Blogger's (classic and beta) navigation tabs!


Based on an online example from that pattern's description, I was succeeded in turning our labels into similar navigation tabs:


As you can see, the prominent advantage of this tab over my first "horizontal tab" hack is the clear indication of what the user is seeing, with the active tab in light grey color, and the sub-label in bold.

Following are the steps on how to convert:


Step 1: Adding CSS code to the end of the template's CSS portion


/* base styles for extending/overriding */

/* primary tabs */
.navset {border-bottom:1px solid #999;}
.navset .hd li em {font-weight:bold;}
.navset .hd li a {color:#666;}
.navset .hd li.on strong, .navset .hd li.on strong a {color:#999;} /* selected tab */
.navset .hd li.on strong {background-color:#F2F3F5;border-bottom:1px solid #F2F3F5;} /* border-color should match selected color */
.navset .hd li.orphan, .navset .hd li.orphan a {color:#999;}

/* bg images, defaults to #999 border-color on white bg */
.navset .hd li a, .navset .hd li strong {background:#ccc url(http://us.i1.yimg.com/us.yimg.com/i/us/nt/el/tb/tr_999.gif) no-repeat top right;}
.navset .hd li em {background:transparent url(http://us.i1.yimg.com/us.yimg.com/i/us/nt/el/tb/tl_999.gif) no-repeat;}

/* secondary tabs */
.navset .bd ul {background-color:#F2F3F5;border-color:#999;}
.navset .bd li, .navset .bd li a {color:#06c;}
.navset li.on, .navset li.on strong {font-weight:bold;}
.navset .bd li {border-color:#ccc;} /* pipe divider */

/* end base styles */

/* Network tab standards, shouldn't change */

/* shared pri and sec */
.navset {width:100%;} /* IE: width */
.navset a {text-decoration:none;}
.navset ul, .navset li {margin:0;padding:0;list-style:none;}
.navset li {float:left;display:inline;}
.navset li a:hover {text-decoration:underline;}
.navset ul:after {clear:both;content:'.';display:block;height:0;visibility:hidden;} /* clear non-IE */
.navset ul {zoom:1;} /* clear IE */

/* primary tabs */
.navset .hd ul {font:bold 78%/1.2em verdana;margin-bottom:-1px;padding-left:.3em;position:relative;} /* IE quirks mode: relative */
.navset .hd li {margin-right:.33em;padding:0;}
.navset .hd li.on strong a {cursor:default;}
.navset .hd li a, .navset .hd li strong, .navset .hd li em {display:block;}
.navset .hd li a, .navset .hd li strong {*display:inline-block;} /* IE: 100% clickable */
.navset .hd li em {font-style:normal;padding:.5em .6em;}
.navset .hd li.orphan, .navset .hd li.orphan a, .navset .hd li.orphan em {background:transparent none;border-width:0;margin:0;}

/* secondary tabs */
.navset .bd ul {border-top-width:1px;border-top-style:solid;font:78%/1.2em verdana;margin:0;padding:.6em 0 .6em .4em;}
.navset .bd li {border-left-style:solid;border-left-width:1px;display:inline;padding:0 1em;}
.navset .bd li.first {padding-left:0;border:0;}


Step 2: Add the Label Widget to the content (blog) area

First, make sure "Expand Widget Templates" is checked. Then, locate the widget Blog1, and cut-n-paste this code (seen below) right in front of it.


<b:widget id='Label2' locked='false' title='Labels' type='Label'>
<b:includable id='main'>
   <div class='menuHack'>
     <div id='menuList'>
     </div>
   </div>
   
   <script language='javascript' type='text/javascript'>
     var label = &quot;&quot;;
     var text2 = &quot;&quot;;
     var currentLabel = &quot;&quot;;
     var activeLabel = &quot;&quot;;
     var firstLine = &quot;&quot;;
     var secondLine = &quot;&quot;;
     var drawTop = false;
     var firstSub = false;
     var currentUrl = &quot;<data:blog.url/>&quot;;
     var arr = new Array(2);

     firstLine = firstLine + &quot;<div class='navset' id='nav'>&quot;;
     firstLine = firstLine + &quot;<div class='hd'><ul>&quot;;
      <b:if cond='data:blog.url == data:blog.homepageUrl'>
firstLine = firstLine + &quot;<li class='on' title='selected'><a expr:href='data:blog.homepageUrl'><strong><em>Home</em></strong></a></li>&quot;;
     <b:else/>
firstLine = firstLine + &quot;<li><a expr:href='data:blog.homepageUrl'><em>Home</em></a></li>&quot;;
     </b:if>
     secondLine = secondLine + &quot;<div class='bd'><ul>&quot;;
     <b:loop values='data:labels' var='label'>
       label = &quot;<data:label.name/>&quot;;
       text2 = label.charAt(label.length - 1);
       if (text2 != '.') {
          arr = label.split(&quot;*&quot;,2);
          if (arr[0] != currentLabel) {
            currentLabel = arr[0];
            /*var arr2 = new Array(2);
            arr2 = arr[0].split(&quot;&quot;,2);*/
            if (currentUrl.search(arr[0]) != -1) {
              activeLabel = label;
              if (drawTop == false) drawTop = true;
              firstLine = firstLine + &quot;<li class='on' title='selected'><a expr:href='data:label.url + "?max-results=100"'><strong><em>&quot; + arr[0].replace(/_/g,' ') + &quot;</em></strong></a></li>&quot;;

          }
          else
              firstLine = firstLine + &quot;<li><a expr:href='data:label.url + "?max-results=100"'><em>&quot; + arr[0].replace(/_/g,' ') + &quot;</em></a></li>&quot;;
          }
         if (arr[1] != undefined &amp;&amp; currentUrl.search(arr[0]) != -1) {
         var secClass = &quot;&quot;;
         if (firstSub == false) {
           firstSub = true;
           secClass = &quot;class='first'&quot;;
         }
         if (currentUrl.search(arr[1]) != -1) 
           secClass = &quot;class='on'&quot;;
           secondLine = secondLine + &quot;&lt;li &quot;  + secClass + &quot;&gt;<a expr:href='data:label.url + "?max-results=100"'>&quot; + arr[1].replace(/_/g,' ') + &quot;</a>&lt;/li&gt;&quot;;
}
}
     </b:loop>
     firstLine = firstLine + &quot;</ul></div>&quot;;/*1st line*/
     secondLine = secondLine + &quot;</ul></div>&quot;;/*2nd line*/
  
     arr = activeLabel.split(&quot;*&quot;,2);
     if (arr[1] != undefined &amp;&amp; currentUrl.search(arr[0]) != -1)
       firstLine = firstLine + secondLine;

     firstLine = firstLine + &quot;</div>&quot;;/*navset*/
     obj = document.getElementById('menuList');
     obj.innerHTML = firstLine;
      </script>
</b:includable>
</b:widget>


Step 3: Label/Re-label your posts

To make this hack works, you need to re-label your posts. There are three rules:

1. If you don't want to see a label or sub-label, put a period (".") at the end.

2. Labels/Sub-labels are separated by a star ("*"). For example, if you like to have a common tab named "Art", with sub-menu such as "Paintings", "Architectural", "Decor", etc., then you should have posts with labels sucha as Art*Paintings, Art*Architectural, Art*Decor, etc. The key is to keep the tab name the same ("Art".)

3. Words are separated by underlines ("_"), this step must be followed so that the current selected label could be shown in bold.
For example, this is a valid tag: "Modern_Art*Pablo_Picasso", and not this "Modern Art*Pablo Picasso".


Discussion:

-By defaults, labels are sorted alphabetically. Don't change this default (using widget visual editing.)

-Even though underscores are in your labels, the main or sub labels won't show them but replace with spaces instead.

-As always, create a new blog to test this hack before applying it to your main blog. Don't forget to make a back-up of your main blog's template regularly.

- I have my test blog here for you to reference on how to name labels the correct way in order for the labels to show as tabs:

http://blogger-beta-from-ground-up.blogspot.com/

-If you can follow my logic in Javascript, you will see that I try my best in making the hack a "one-loop" algorithm. Originally, I had 2 loops, one for the upper tabs, and one for the sub-labels. Eventually, I realize I could use two strings for two divs, and only append the second string if the sub-labels present. I also learned quite a few JavaScript tricks from this one, such as one to replace underscore with a space, searching a string inside another, etc. Overall, it's a noteworthy hack to look at and make improvements upon.

That's it. I hope you will find this hack useful.

Have a wonderful day,

Hoctro (9/24/2006)
Blog: http://hoctro.blogspot.com/

Hacking Technique: On JavaScript


Dear Friend,

It was only last week that I was introduced to Hackosphere from Buzz. Ramani showed me a new hacking utopia where one can hack Blogger 3.0 to his or her heart's content. He explained every single one of his hacks to us, in great details, yet still somewhat kept a "secret" (at least for me under my tired eyes from hacking Beta for a week now that I couldn't see straight ;-) - that a week later, after much soul (and google) searching, I found it not too far away but in his treasure chest, once again - the missing piece that glued everything together: how to program Beta with JavaScript. Yes, he kept his "secret" under a link, but once I found out, I can see a truly new world of hacking possibilities.


You see, Blogger Beta provides a way to retrieve a piece of data or a collection of data, along with a (mysterious at first) function-definition and function-call system, the primitive if-then-else expression and the irreplaceable loop command. But, with only those few limited tools, one can only hack so much. What we need is a complete language with variables, array, other kind of loops and logic expressions, to name a few. I guess I kind of know all along that JavaScript is the One, but how to do it in Beta's template is a different matter.

The code Ramani presented us opened up all sorts of interesting things. He showed that we can compare an integer to another, how to declare a variable then assign a Beta piece of data to it, and how to append those data to show in an id using the innerHTML method. It's not that I have not done similar things like that before, it's just that I thought that if Beta is so XML-compliant (it needs the "CDATA" to wrap around CSS instructions, for example ), maybe coding JavaScript the regular way wouldn't work.

Well, his hack works, and so does his JavaScript embedding style.

Based on his success, I was able to write a live demonstration showing the seven different ways to display your homepage by just clicking on a different icon.


Below is the stripped down version of it, showing how to code a printer-friendly vesion on a webpage.

Installation:

To install this hack, follow all the steps from my previous hack. Then, create a fake HTML element. Once this is done, drag it to the bottom bar. Then look for the code near the end of the expanded version of the template. Replace the HTMLX widget with the code below, making sure to fix the id so it would match the id of the template.


<!-- Printer Friendly Hack  9/14/06  - Need to install Yahoo! Grid CSS hack first from here:
http://hoctro.blogspot.com/2006/09/tweaking-new-blogger-yahoo-ui-librarys.html
-->
<b:widget id='HTML3' locked='false' title='' type='HTML'>
<b:includable id='main'>
  <div class='printer-friendly'>
    <a href='javascript:void' onclick='javascript:changeStyle("yui-t6");' title='yui-t7'>Back to normal</a> ***
    <a href='javascript:void' onclick='javascript:changeStyle("yui-t7");' title='yui-t7'>Printer friendly version</a>
   </div>   
  <script language='javascript' type='text/javascript'>
  function changeStyle(style) {
    obj = document.getElementById('doc');
    if (typeof style == "string") obj.className = style;
    }
  </script>

  <b:include name='quickedit'/>
</b:includable>
</b:widget>


That's it! Noticed how JavaScript code can live together with Beta code is such a peaceful and natural manner.

This picture shows the links are placed at an unintrusive location (the very bottom of the page) in normal style,


and in printer frienly version,


This hack shows that if not for anything else, the ability to have a printer-friendly version should worth your time installing my previous CSS Grid hack.

I would like to thank Ramani again for his unselfishness in showing his "secrets" to others, so that we could all push the new Blogger Beta to new heights.

Cheers,

Hoctro (9/14/2006)
Blog: http://hoctro.blogspot.com/


Update: (October 12, 06)
Here is the code I use for showing the hack on my front page. Feel free to use it on your site if you like it.


<b:widget id='HTML2' locked='false' title='Try this h a c k out' type='HTML'>
<b:includable id='main'>
  <!-- only display title if it's non-empty -->
  <b:if cond='data:title != ""'>
    <h2 class='title'><data:title/></h2>
  </b:if>

  <a href='javascript:void' onclick='javascript:changeStyle("yui-t1");' title='yui-t1'>
  <img class='img_cls' src='http://photos1.blogger.com/blogger2/3768/593528219081732/400/t1.jpg'/></a>
  <a href='javascript:void' onclick='javascript:changeStyle("yui-t2");' title='yui-t2'>
  <img class='img_cls' src='http://photos1.blogger.com/blogger2/3768/593528219081732/400/t2.jpg'/></a>
  <a href='javascript:void' onclick='javascript:changeStyle("yui-t3");' title='yui-t3'>
  <img class='img_cls' src='http://photos1.blogger.com/blogger2/3768/593528219081732/400/t3.jpg'/></a>
  <a href='javascript:void' onclick='javascript:changeStyle("yui-t4");' title='yui-t4'>
  <img class='img_cls' src='http://photos1.blogger.com/blogger2/3768/593528219081732/400/t4.jpg'/></a>
  <a href='javascript:void' onclick='javascript:changeStyle("yui-t5");' title='yui-t5'>
  <img class='img_cls' src='http://photos1.blogger.com/blogger2/3768/593528219081732/400/t5.jpg'/></a>
  <a href='javascript:void' onclick='javascript:changeStyle("yui-t6");' title='yui-t6'>
  <img class='img_cls' src='http://photos1.blogger.com/blogger2/3768/593528219081732/400/t6.jpg'/></a>
  <a href='javascript:void' onclick='javascript:changeStyle("yui-t7");' title='yui-t7'>
  <img class='img_cls' src='http://photos1.blogger.com/blogger2/3768/593528219081732/400/t7.jpg'/></a>            

  <script language='javascript' type='text/javascript'>
  function changeStyle(style) {
    obj = document.getElementById('doc');
    if (typeof style == "string") obj.className = style;
    }
  </script>
  <b:include name='quickedit'/>
</b:includable>
</b:widget>

Editing your Blogger Template: Adding Editing Pencil to Your Post

Dear Friend,

While spending time cleaning up my grammar mistakes for my latest post today, I had to stroll to the end of my 6-pages long article again and again, and again (you get the idea :-) to look for the pencil icon to edit the post. Then I thought, hey, why can't I have another pencil at the top of the page, thus saving at least half of my editing time from scrolling down?


After some hacking attempts, the result is sweet:


And so here it is, a hack on "How to add an editing pencil at the top of your post."

Instructions:

Go to your template's HTML editing page, expand it, and look for this line:

<b:include data='post' name='post'/>


add this line right in front of it:

<b:include data='post' name='postQuickEdit'/>

If you use Mr. Ramani's hack (and my enhanced hack to his,) there are two instances of the include (function calls in us hacker jargon :-) so you will have to paste twice in front of each (see picture.)


As you can see, the line just added serves no more than a call to the postQuickEdit function, which in turn will do the checking if you use the editing feature while seeing it live. By putting it in front, you make sure every post on your main page and/or your item page has the pencil. The category/index page in Mr. Ramani's hack is excluded, for we didn't add it in front of the line that prints the title.

That's all folks! Have a nice weekend to you all! Happy (Blogger Beta) Hacking!!!

Hoctro (9/2006)
Blog: http://hoctro.blogspot.com/

Editing your Blogger Template: Defining and Using a Function

Dear Friend,

As soon as I complete my first hack, I start thinking about refactoring it. Anything that is repeated again and again, is of course a good candidate for refactoring. As you can see, the header date is repeated twice:

     <b:if cond='data:blog.pageType == "item"'>
       <h2 class='date-header'><data:post.dateHeader/></h2>
     </b:if>
     <!--Fix Bug for not showing the date on main page - 7 Sep 2006 -->
     <b:if cond='data:blog.homepageUrl == data:blog.url'>
       <h2 class='date-header'><data:post.dateHeader/></h2>
     </b:if>


After reading the Beta Blogger Help Line, I found out how to make functions and function calls. Basically, you define a function call inside a widget only, and the scope of it thus is inside that widget. In Beta Blogger lingo, a function is called an "includable." You can call a function without THE parameter (since Blogger only allow ONE parameter to pass from the function call.)

Here is an example of a function definition:

  <b:includable id='hoctro_dateHdr'>
    <h2 class='date-header'><data:post.dateHeader/></h2>
  </b:includable>

Then, once you define the function, you can call it, such as:

  <b:include name='hoctro_dateHdr'/>

Thus, here is my improvement of my first hack. It works the same as of the other one, so you don't even have to update that one with this one.

First, look for the Blog1 Widget:

<b:widget id='Blog1' locked='false' title='Blog Posts' type='Blog'>


Then, right before the "main" includable of that widget, add these three lines:

  <b:includable id='hoctro_dateHdr'>
    <h2 class='date-header'><data:post.dateHeader/></h2>
  </b:includable>


Finally, replace the <div id='blog-posts'> of the "main" includable with this one:

<b:includable id='main' var='top'>
  <!-- posts -->
  <div id='blog-posts'>
    <b:loop values='data:posts' var='post'>
    <!--Improved hack from Hackosphere By: Hoctro http://hoctro.blogspot.com - 6 Sep 2006 -->
    <!-- This hack allows posts to be shown without dates and as a bullet list -->
        
        <b:if cond='data:post.dateHeader'>
          <b:if cond='data:blog.pageType == "item"'>

            <b:include name='hoctro_dateHdr'/>

          </b:if>
          <!--Fix Bug for not showing the date on main page - 7 Sep 2006 -->
          <b:if cond='data:blog.homepageUrl == data:blog.url'>

            <b:include name='hoctro_dateHdr'/>

          </b:if>
        </b:if>
      <!--End of Improved hack from Hackosphere By: Hoctro  -->
      <!--Hack by Hackosphere - 6 Sep 2006 -->
      <b:if cond='data:blog.homepageUrl != data:blog.url'>      
        <b:if cond='data:blog.pageType != "item"'>   
           <!--Improvement Hack by hoctro - 7 Sep 2006 -->       
           <ul><li><a expr:href='data:post.url'> <data:post.title/> </a></li></ul>
           <!--End of Improvement Hack -->     
         <b:else/>          
           <b:include data='post' name='post'/>      
         </b:if>  
      <b:else/>      
        <b:include data='post' name='post'/>  
      </b:if>
      <!--End of Hack by Hackosphere - 6 Sep 2006 -->
      
      <b:if cond='data:blog.pageType == "item"'>
        <b:if cond='data:post.allowComments'>
          <b:include data='post' name='comments'/>
        </b:if>
      </b:if>
    </b:loop>
  </div>


I know it's quite involved for all of us Blogger newbies, but once it works, you'll feel proud that you're hacking the right way, the Blogger (Beta) way.

Cheers,

Hoctro (9/2006)
Blog: http://hoctro.blogspot.com/